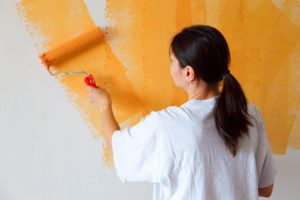
 At times it”™s tempting to take on small projects by yourself, but even the little things can end up causing more headaches than results. The scale might be small, but it”™s always wise to call a professional, if only for advice. While it might seem unlikely, we”™ve seen some do it yourself painting projects end in disaster. No one is immune to the occasional paint run, but our professionals have the knowledge to stop problems before they can do any harm. Because we believe in sharing our knowledge, we”™ve taken it upon ourselves to give you a few insider hints to help make your next paint job hassle- free.
Paint Runs
This is a common problem many amateur painters have, and luckily, the fix is easy. Paint runs are caused by the application of excess paint or from paint running over a nail. Preventing this is extremely easy if proper care is taken to remove dripping paint from a brush before application and to ensure that your surface is nail free. If a run does occur and it”™s caught before it has a chance to dry, you can easily swipe the brush upwards from the bottom of the run to eliminate it.
However, if a run isn”™t caught until it”™s dry, it”™s going to take a little more work to correct. Start by using a piece of relatively fine sandpaper on the bead of dried paint. As it becomes smaller and smaller, continue to change sandpaper until you”™re using an extremely fine grit. Once the surface is smooth, use the same extremely fine grit to feather the edges of your area, helping it blend with the rest of the painted wall. Next, take a wet cloth and run it over the sanded area to remove any dust. After this, you”™ll be ready to apply a light touch up coat of paint, and your mishap is now history.
Lap Marks
Lap marks, simply put, are the differences in coloration that sections of wall will appear to have if paint is applied incorrectly. The areas may appear lighter or darker, or have a different sheen, but the cause is all the same. This problem arises when wet paint is applied over dry paint. This is usually the result of the painter not following a “wet edge” (painting from wet paint to dry paint), or it may also occur when painting in high temperatures.
To avoid this, when you paint a large wall, paint in sections, never top to bottom. This will ensure that the top of the wall will not be dry before you return to it from the bottom, thus preserving your wet edge. If a lap mark does occur, it can be corrected by applying another coat of paint, although care must be taken to maintain a wet edge the second time around.
Paint Wrinkling
This problem is less common, but will likely provoke a panic because its cause is less obvious. Paint will wrinkle when its top layer dries before its bottom layer.
The common causes of wrinkling are applying paint too thickly, as well as painting in extremely hot or humid weather. A thick layer of paint can prevent bottom layers from adequately drying due to limited air exposure, and painting in hot weather, which is always a concern in Boulder, can similarly allow the sun to dry the top layer too quickly. Humid weather can be especially tricky, as this can lengthen curing time. If the primer isn”™t set before paint is applied, wrinkling will occur. If the paint itself holds moisture, it”™s more likely for the sun to dry out the top layer too soon.
When getting started on a DIY project, it”™s best to expect problems to happen and prepare yourself for the worst. But with our professional painting tips, we”™re confident you”™ll be able to catch problems before they become disasters. If your DIY project becomes more than you bargained for, or if you”™re just not feeling up to painting that one overdue bedroom, considering calling us. Our team of professionals takes pride in our work, and we would love to show you why we consider ourselves to be the best painters in the Boulder, Colorado area.
