Painting the inside of your home is always a fun DIY project, however to paint your ceiling can be a bit intimidating because it involves working in an awkward position. No need to fret, this project can go very smoothly if you prepare properly and follow a few simple steps that will help you complete your project like a pro.
Purchase Tools
The tools needed for the project will be based off the dimensions of the ceiling and its texture. If you have high ceilings you may have to use an extension to your roller brush, as well as determine what size ladder will work best. Textured ceilings usually need a thick-napped roller brush, which will make it easier to glide over uneven surfaces.
It is also important to choose a paint for the ceilings that is a bit thicker than the paint used on the walls. A thicker paint is more effective at covering spots, stains, watermarks and general surface flaws.
Prep the Room
It is important to prepare your room before you start painting in order to avoid any unwanted stains on your floors or furniture. Try to remove as much furniture as possible, and cover the remaining things with large, durable cloths. Newspapers or plastic sheets can be used to cover up the floors and protect from any paint spillage.
Prep the CeilingÂ
Prior to applying any paint, you must prep the ceiling in order to have the best quality paint job possible. Make sure to remove any existing, loose paint, and wash off any signs of dirt, grease and mildew. Next, apply a primer that contains a stain blocker. This step is important because the primer will make it possible to use only one coat of paint to finish.
Paint a Cut Line
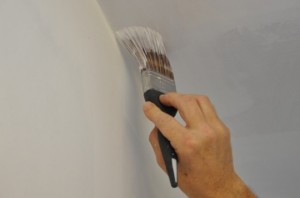
Begin your paint job by making a cut-in line on the ceiling. Make a 3-inch strip of paint with a paintbrush around the room”™s perimeter where the wall meets the ceiling. This cut-in line marks the areas where a roller cannot cover without getting paint on the adjacent walls.
Use a paint roller to paint the entire ceiling and as much of the cut-in band as possible because the paintbrush, which the cut-in line was drawn with, leaves a different texture than the roller brush.
Painting Technique
Now that you have properly prepared your ceiling, it is time to paint. Slowly plunge the roller into the deep part of the paint tray, and use the shallow end of the tray to even out the paint. Lightly press down on the roller and slowly roll back and forth in order to get an even coat of paint.
When painting the ceiling, use the roller to create a zigzag pattern, and then go over the zigzag pattern using straight strokes. This technique helps distribute the paint more effectively. After you have completed your first coat, evaluate the ceiling and decide if it will require an additional coat.
Don”™t want to take on this project by yourself? Give us a call and we”™ll handle it for you!


