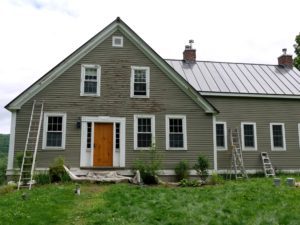
Photo Courtesy of Rebecca Siegel ”“ License
Homeownership can be a very gratifying experience. Owning property gives a person the freedom to make their own choices; the ability to customize their home in any way they see fit. Unfortunately, however, for every day spent lounging on the patio, there will be another spent painting the house. That”™s where we come in. Hiring a professional painting service can help ease the responsibility on you as a homeowner. We can walk you through our process, so you know your home is in good hands.
Preparing the exterior of your home is crucial to making sure the rest of your paint job is a success. Assuming the surface is wood, because you don”™t paint vinyl siding, it”™s critical that proper procedure is followed to ensure the longevity of your paint job.
The first step in surface prepping is to remove old paint from the wood. There are several ways to do this, but the most prominent two are using a pressure washer or a simple paint scraper. Going the pressure washer route can save time, but can also have unintended consequences. The water pressure from the machine is extremely powerful, and while it can remove paint with ease, it can also damage caulk around windows, over saturate paint stripped wood, or even cause harm to the operator. Our team is trained in the proper usage of pressure washers, but a paint scraper can be just as powerful in the hands of a motivated person.
Once the old paint has been completely removed, the next step is sanding down the exposed wood, using a very coarse, 60-grit sandpaper. The sanding is perhaps the key element in preparing your home for its paintjob. Wood that has been exposed to weather over an extended period of time breaks down into loose fibers. If these fibers aren”™t removed, the fresh paint won”™t properly adhere, diminishing both its longevity and ability to protect wood. Also important to note is that our beloved Boulder sunshine can do very real damage to wood that”™s constantly in its path. Newly exposed wood may be sunburned, detracting from the paint”™s ability to adhere. We make sure to sand down, going with the grain, any sun damaged wood.
Your wood has been given new life, and it”™s time to ready it for new paint. After spraying off any sanding remnants or dirt with a garden hose, the wood is ready to prime. For the best result, apply an oil-based primer and wait 24 hours. If the wood absorbs nearly all the primer, a second coat may be needed. It might be tempting to skip this step, but applying primer provides a moisture barrier over the wood, helps the paint”™s adhesion, and improves the chances of a perfectly even finish.
Now that the hard parts are done, it”™s on to caulking any visible cracks or crevices. Following existing caulk lines makes sure the old caulk isn”™t missing anywhere, and allows extra attention to be paid to spaces between boards where moisture might seep through. Corners where several boards meet are conducive to leaks, and need to be sealed. We believe strongly that all caulking should be left until after the primer has been applied; caulk won”™t bond as well to unfinished wood. If you haven”™t already, now is the time to start choosing a paint color.
The process from old paint to primed wood isn”™t easy, and it isn”™t quick, but it makes all the difference in the long run. If you”™ve decided that exterior prepping sounds like an undertaking, (it certainly is) give us a call. We”™re here to improve your home, and your life, so you can spend fewer days with a paintbrush, and more on the patio.
